Showing posts with label serger. Show all posts

March 29, 2015

Sewing for Me with Katherine Tilton and Vogue

 I have a number of fabric purchases that have been awaiting their turn to be transformed into SOMETHING but this project took precedence and got done. I attended the Cleveland Quilting and Sewing EXPO this week and for such occasions you MUST wear something hand made. I did so for one of the two days I spent there and here it is.
The fabric is a reversible knit in dots and stripes AGAIN. I made something with reversible knit previously (see here). 
The pattern is Vogue 8793 by Katherine Tilton and I chose it for the bit of quirkiness and the zipper detail on the double collar. The knit I chose is probably a bit stretchier than the Moderate Stretch Knit Only which is suggested. The stretchiness might be why the sleeve on the right in this photo is so much longer than the left. A tug would have evened them up but didn't see it until I put it up here.

An advantage of the extra stretch is that the sleeves are a bit tighter than I would like,  but the give makes it tolerable.

Here it is on me. Ooooh, I wish I matched this mannequin. She is a display piece NOT my dress form. 
This collar was the main reason to purchase this pattern (ON SALE) because all Vogue patterns are ridiculously priced (SEE HERE) The printed price on this one is $30. I got it online somewhere for $6, I think.
Again, I ignored instructions and bought a metal zipper, which is definitely what is shown on the pattern picture. 

Adding that double collar was the trickiest because the collar had a wad of layers and they are being sewn onto one rather thin and stretchy shirt layer. I did it on the regular machine with a stretch stitch and then trimmed it up on the serger. A row of top-stitching along that collar seam would have been nice, but I know I would have messed it up. It would have needed an interfacing to handle it and one more layer in that collar seam would have been asking for disaster.

It called for a Lightweight Molded Separating Zipper.  That would be plastic. I wanted this to have the effect of funky jewelry and plastic would just look stupid.  Granted, it would probably work out better in the laundry. This will be hand-washed, dried flat as I can imagine those little metal teeth biting into the soft knit.
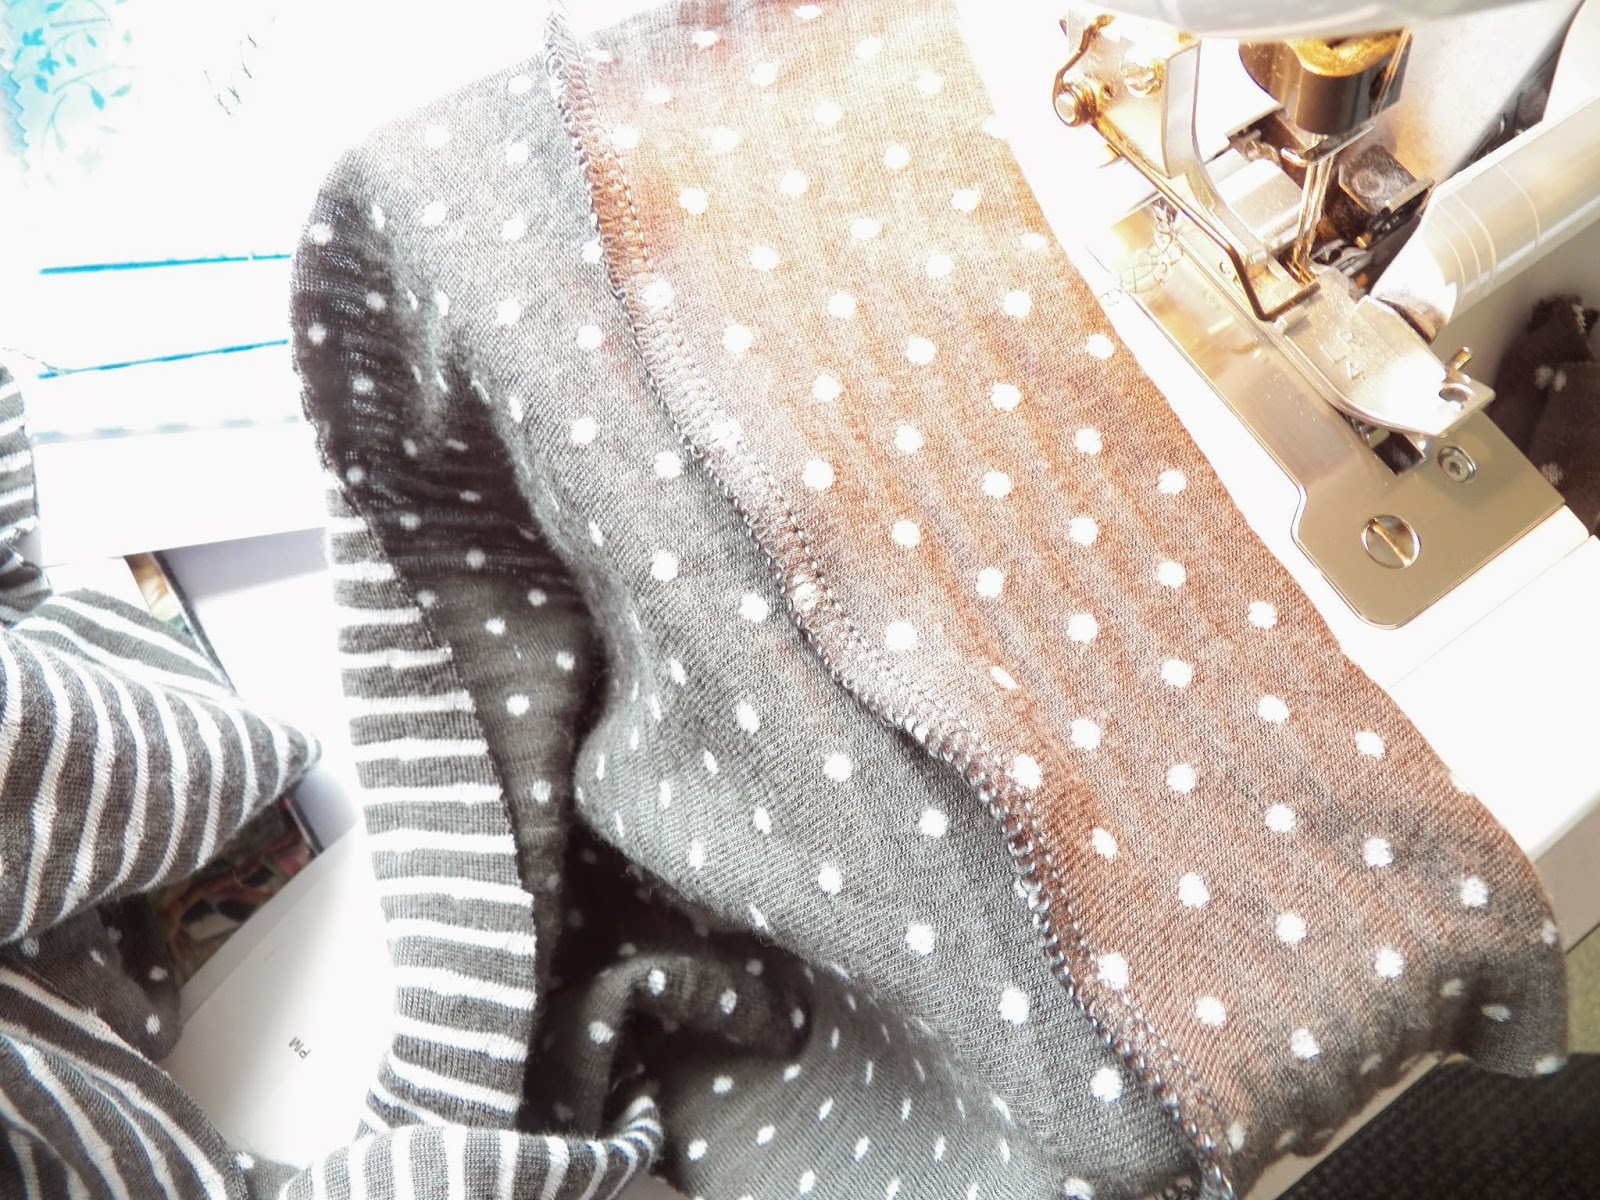
Most of the shirt was assembled on the serger. Here I, once more, defy instructions and add the cuff BEFORE sewing up the sleeve seams. The pattern did show sewing the sleeve and side seams after the shoulder seam as in most knits.                                                                                
Again, I wish I was built like this mannequin. But even with Francine's nice straight shoulders you can see a glitch and a bit of stripe misalignment. My remedy for this is to just keep moving and no one will notice. 
Even after adjusting the shoulder width and using tape on the seam, I still get a droop. This pose is also not helping. Hubby was drafted into taking these and he worries way more about the edges of the picture and ignores how to make me look my best.

For your viewing pleasure, here is the left and right sides on Francine. I wish I had mixed it up a bit more on the inner and outer sides of the collars. This pattern would give you a way to mix and match a bunch of leftover knits. I would just make sure to pre-wash and make sure they are equally stretchy.                                                                                                     
Watch for the next installment of ThimbleFingers where I will show you what I acquired at the sewing expo that may change my life!


October 27, 2014

OH, NO! I did it again!

Yes, I did it again. I broke my serger. I had recently gotten it repaired because I forced a way too thick  pile of fabric through it and paid the price to my very nice repairman, "Doc" Watson and then a few days ago I was working on some new items for my Etsy shop which involve lots of ruffles and I failed too extract a hidden pin in the three layers. BAM! A piece of metal flew into the air and all sewing ceased.  See new blades on left and obviously the old on the right.


"Doc" is out of town for awhile and I was too embarrassed anyway to admit my stupidity so I hopped over to Ken's Sewing Center (sorry Doc) and found exactly the blades I needed and they arrived today.

The manual is very vague about replacing the knives. Like many instructions, they dwell on the obvious while skimping on the tricky parts.

I read what I could find online about the process and one suggestion was to take photos before I removed anything. Great advice if you haven't already leaped into the abyss.

The first problem is that I cannot SEE the lower knife in the picture AND failed to note how it came off the machine. So I had it backwards. Luckily I prevented anymore catastrophes by making sure the serger was unplugged and I only moved the wheel SLOWLY by hand until all was in order.


The instructions also recommends adjusting the "clearance between the upper and lower knife to between 0.5mm and 1.0mm". Wah?  How? 

After about an hour I succeeded and feel very proud of myself and relieved that I won't have to face the pity and expense of "Doc" and I can get back to work before he gets back to work.

This is what I have been working on:
RUFFLES!

I decided that my Etsy shop could use some stuff for the kids and if they don't sell my granddaughter could wear them. I love doing the edged hems and gathering on the serger and the most fun is playing with all the patterns and colors in my fabric stash.


Now my next problem is how to photograph them.  Granddaughter lives an hour away and when I do  get her over here she isn't always in model mode.  For the purpose of the blog I plopped them over the neck of Francine, my adult display mannequin, which looks pretty weird.

 I also made little bags/purses out of the scraps which I think makes them more desirable.  In fact I did my second of only two craft shows that I do each year and one of these sets (not shown here) was the ONLY sale I made ALL DAY!!!*#@!*
The reasoning among all the sellers who were also bummed was that the weather turned out so great that day that everyone stayed home to rake leaves or found a more fun outdoor activity. We will never know for sure.
Its a good thing I do this for fun and not profit. I just support the habit...hopefully.

I have got to find a child size mannequin or a cooperative nearby kid.  Maybe Craigslist? Is that too creepy?


September 25, 2014

Serger Fix + Results

Black is a birch to photograph. See the fabric in the next photo.
Well, it has been awhile since my last post when I was ready to sew up the top and sweater combo on my serger.   Well, if you saw that post you saw that the serger had a major problem. A new presser foot was acquired quickly but the problem went much deeper.  I managed to bend the shaft. I took it to Jim "Doc" Watson in Medina and he fixed me up and gave me a few warnings to be kinder to the machine and to use serger needles.  I will be kinder and I will TRY some serger needles when I get them.
Sewing apparel is not my passion.  I like making almost anything else in fabric but hate fitting and I am not the patient type who has EVER made a muslin. I make a few adjustments for my narrow shoulders and lack of height and that's that.

I did sew this up with no problem.  This is going to be my travel outfit for an overnight flight to Italy next week.  I wanted something that would basically feel like pajamas and I think I achieved it. 


 The fabric is reversible so I wanted to make this drapey cardigan that can show both sides.  The dotted side is barely discernible from any distance so I chose to show off the slightly neon stripey side.                
       
 Here is the princess seam top where I used the dots in the center and stripes on the sides.  It could be a little more fitted, but then again, I was going for comfort.


This is the first time for selfies.  I set up the camera on a tripod and used the timer. It felt weird and odd to smile so I look pretty glum and didn't take time for make-up and hair a la Project Runway.


The fold above my butt is not the patterns fault. I just should have straightened it out.


And here it is with one of the scarves to jazz it up.  I prefer this to jewelry when traveling.  
BTW, those pants are RTW from Macy's and I got them at a great price and best of all they are marked SHORT and they actually ARE. No hemming even for sub 5" me. I am no sewing purist.

I have been reading a ton of sewing blogs  staring with Peter's Male Pattern Boldness  and branching off from his list and I am really impressed by the great creations from all of them (especially Oonaballona)


I would maybe try some of those darling dresses if my lifestyle of a retired school librarian in small town Ohio offered up occasions to wear them.  


However, I may be inspired to try a jacket or coat.  When in Rome at the end of our tour I plan to visit 
-Fratelli Bassetti Tessuti on Via Vittorio Emanuael II, 73 is one of Rome’s largest fabric stores and also the fabric source for many Italian clothing and interior designers. Opened in 1954 by two brothers, the store is on two floors with double-height ceilings. It holds 200,000 fabrics in any color, shade and texture, distributed in a labyrinth of rooms and layers of rolls of fabric.
 I copied this from Design Sponge

Maybe a nice Italian wool to get me through another Ohio winter.


September 5, 2014

Fabric Obsessions and Me Made Clothing Project

I found this fabric at Joann's the other day and it was even ON SALE! I don't sew a lot of clothing but  when I see something as great as this I can't resist.

IT'S REVERSIBLE! And dots and stripes together just really turn my sewing "hormones" on.


 I have made this pattern before but wasn't completely happy with it.  Then while poking around yesterday at my nearby outlet mall I came across this sweater.


I like the way it folds back more at the front drape than my previous pattern did.


SO, I bought it.


BUT, only for a while.  It's going back to where it cam from very soon.


AFTER I pirate the front panel!

This is the pattern I'm using, sort of.  I'm a sucker for patterns that include
loads of pieces...especially when they go on sale.

 I took a large piece of the pants pattern which I don't intend to use and attached it to the original sweater pattern.


 I simply laid out the store-bought sweater front
over it and traced around it.  I know that a real expert would have been more particular about this but I have found knits to be pretty forgiving.

The thinner  part is the neck extension. I didn't like the way the original had you pleat up a bunch of fabric at the neck back.  This one is going to be
simpler and less bulky.


 Now see this sleeve? I would probably wear it
rolled like this because my arms are really short and even petites hang over my knuckles.


But look at it unrolled
There is a hole in the knit which could run AND that seam is not very nice either.


I had considered hanging onto it since the price wasn't terrible BUT, the fabric is...at least for me.

It's a rayon (60%) polyester (40%) blend which after having it on for only a short while produced a moist feeling.  I tend to "moistness" and prefer cottons and other natural fibers.


All afternoon was spent cutting this out.  It shouldn't be that hard but I bought 2 yard and was determined to get the top (view C)  out of this fabric as well.


Keep following me as I take a sewing journey and a real journey.  This top and sweater along with a pair of RTW pants in my closet are going to be my overnight flight to Italy outfit next month.  I am so excited.  After I return you may want to stop by my other blog to see how it all went.

Note:  I cannot start sewing on this until MONDAY when a replacement presser foot for my serger should arrive. My serger went CLUNK like Peter's of MPB so I referred back to how he handled it. NOT, the same problem but discovered that when the presser foot was removed NO CLUNK!


See that tiny little tooth-like thing in the opening of the foot. It's bent down a bit and apparently hits a moving part when operating.  I have no idea how I managed this and hope a new foot is the answer! I don't suppose all those skid marks should be there either.

Questions:
1. Do you buy RTW to copy and the return?
2. Have you ever managed to BEND a presser foot?


June 27, 2014

Tablecloth or Top???

Yesterday I decided it was time to tackle another ME project with the knits I bought on my NYC trip. Its been getting hotter and steamier and really feeling like true summer so why not a picnic?
This yellow and white giant check cotton jersey from MOOD seemed quite appropriate.


I had these two patterns laying idle for just such a day and decided to combine features of each. I chose the very simple A view (purple in pic) from the McCalls 6960. The photoed one is great but not  in this fabric for sure. I added the little flutter sleeve from view D of the New Look 0190 which is not a pattern suggested for knits.
 Laying the fabric out for cutting I experienced a dilemma. The check is printed slightly off grain. When folding  the center front fold the lines don't match up. Oh well. I went with a nice straight center front. It didn't prove to be a real problem.

The I eliminated the front and back facings. They would look clunky in this lightweight fabric and complicate adding the little sleeve.


Stay-stitching the neckline.


After serving the shoulder seams and slipping this over my head I saw I had the same problem I always encounter due to my height (or lack of). The v-neck  and the underarm were going to expose my under garments. I should have adjusted the pattern ahead of time but when I held the tissue pattern up to my body it didn't seem so bad. Easy fix. I re-serged below the previous stitching.


                                                  Then re-trimmed the back neck a bit.
Blech! That ironing table cover is disgusting. Thats the spot that gets used the most. The rest of it looks great


I did my first non-practice rolled edge with my serger. I'm OK with it but when photographing it, hubby said he thought it wasn't finished.

                   This is the strip for the neck-band. The darker side is going to be the exposed side.
I used the stretch stitch on my sewing machine since the V neck turn was not going to work very well on the serger. After getting it set in place I did go back and serger the raw edged to clean them up. Forgot to take a picture.

The whole underarm was now unfinished since I didn't use the facing. I was able to turn it under and using a wide double needle I faked a nice coverstitch.  

                        Wondertape stabilizes the hem which is sewed with double needle method.
                                                  Here it is on my display mannequin which is not really my size.*
                                        And here it is outside in the glorious sunshine.

Its so dazzling out here that I am wearing my giant sunglasses that are in the frames I bought at the NYC flea market in May. Also I didn't have to bother putting on eye make-up for the shoot!

*I'm thinking of trying to alter the mannequin to make it a real fitting model. The padding out here and there won't be too hard but her shoulders exceed mine by slightly more than 2 inches. How would I whittle them down?

April 27, 2014

The Internet Made Me Do It

Spending great swaths of time online has been the cause for several things:

Starting a blog HERE

Starting a sewing blog (you're on it)

Reading lots of sewing blogs starting with Male Pattern Boldness 

Wanting a serger. Read about it HERE.

Wanting a better serger. The Toyota  was a nightmare to thread and had other limitations.


Now the serger and the online inspiration have come together and "forced" me to actually try sewing a garment.  I have been avoiding this for a long time because I always have some glitch that dashes the whole project.

While going through my closet I found a little cotton knit top that I bought some time ago and really liked but it never seemed quite right. It was too short which is rarity on me since I barely reach 5' tall.
Since I love the idea of this top, I decided to replicate it. No pattern for  me!  I tediously removed every bit of stitching holding this together in order to create a pattern for a new longer version.


 The solid body of this top was a thin t-shirt knit and the trim a fine woven fabric of two layers with an interfacing. Rows of top-stitching give the trim pieces a bit more body and style. The trim attaches to the edge of the knit without being inside the trim which made it a bit trickier to attach.

Here is my sleeve "pattern" laid out on my slightly heavier knit fabric.
The trim fabric was chosen because
1. I had it on hand.

2. It is very light weight like the original.

3. One of the many colors matched my body fabric.
Here is the work in progress. The picture is blurry as it is very hard to photograph yourself without having the camera in the picture.

At this point this was to be the right side of the garment until I stupidly serged the shoulder seams on the wrong (right) side and I had to reverse the whole thing because removing serging is pretty much impossible and cutting it off would alter the whole fit of the thing.

I found it was a great brain exercise for my elderly mind to figure out the steps to building this thing with no directions.

I loved the way the serger finished off the knit seams.


And here is the reveal...of both me and the top. Or would you call it a sweater since you pretty much have to wear another top under it?

 I have never put a picture of myself on a blog before, but if Peter of Male Pattern Boldness can pose in the underwear he sews, why not?


My age will prevent any speculation as to whether this is a maternity top!


                        I love color. Some of you may wince at the brightness of this, I know.

                   
My favorite feature is the little cuff split and the stitching around it.


But there is a problem and I have had this happen before even when using a commercial pattern that had a placket neckline.

  The neckline is not laying flat. Well, there is also the crepey elderly neck, but ignore that!
I can never see this until the whole thing is done. I even made a muslin on a previous attempt at a garment and I still had it show up.  If I keep moving, it hardly shows at all. I am sure the fabulous sewists that follow Peter's blog could offer help or opinions.